Covers: Communicating Changes
Viewing Timetables
When daily changes have been published from the Covers main screen, the changes will be visible on all timetables, provided the access schedule for timetables has been enabled in the Atlantis Timetable module. Once the access schedule has been enabled, staff members who do not have the Covers role, will be able to log on to Atlantis to see their own timetable, other teacher timetables, student timetables and Year timetables. All timetables will display the changes that have been made for the selected date range.
Daily Summary
The Daily Summary is a configurable template that can be emailed to all or selected staff members to inform them of the day’s changes. There is a default template available, however, you can create as many templates as you need and configure the information to be displayed on each one.
To access the Daily Summary, go to Work > Daily Summary. The following is an example of what appears when the default template is used and 'Generate' is selected.
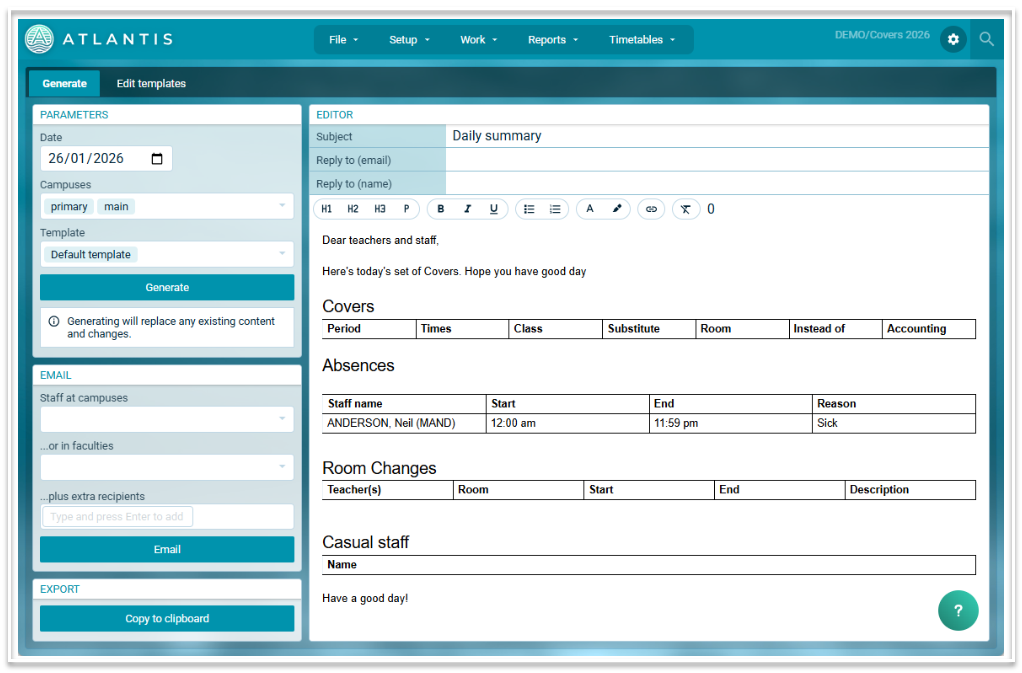
Emailing the Daily Summary
- Select the required date if it is different to the current date, which will show by default.
- Select the required campus or campuses to display the relevant information.
- Select the required template
- Select ‘Generate’ to see a preview of the email. You can make changes to the email text on the preview, however, these changes will not be made on the template.
- You can filter recipients by campus, faculty or you can add additional recipients if required
- When you are happy with the parameters that have been set, select ‘Email’ to send the Daily Summary
- If you prefer to send the email from your own email system, select 'Copy to clipboard'. The formatted email will be available to paste into an alternate email client.
Creating a new template
To create a new template, or to edit an existing template, go to the Edit templates tab.
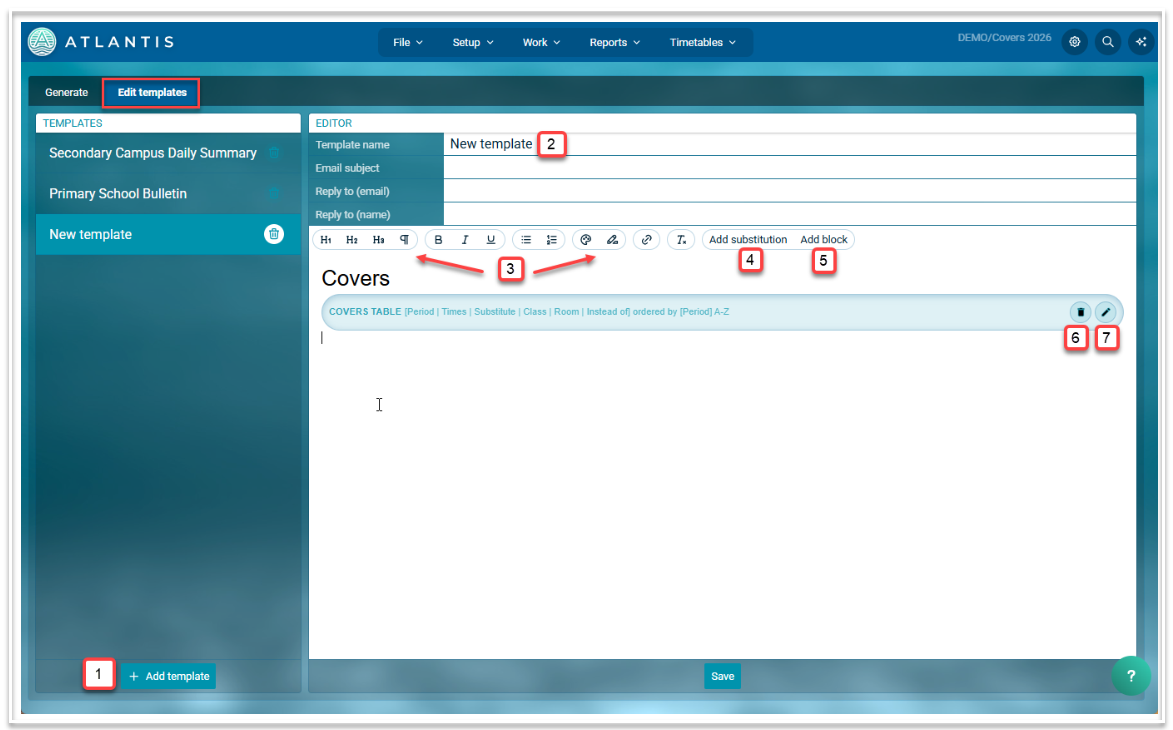
- To create a new template from scratch, select ‘Add template’
- Re-name the template to something appropriate e.g. Secondary Campus
- Use the tool bar to format any text components.
- To add date, day of the week or name merge fields, select 'Add substitution'
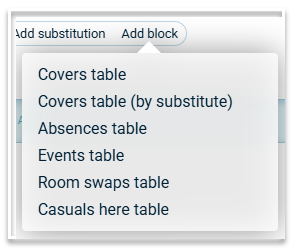
- To add additional tables, select ‘Add block’. This will display the tables that are available.
- To remove a table from the template, select the trash icon.
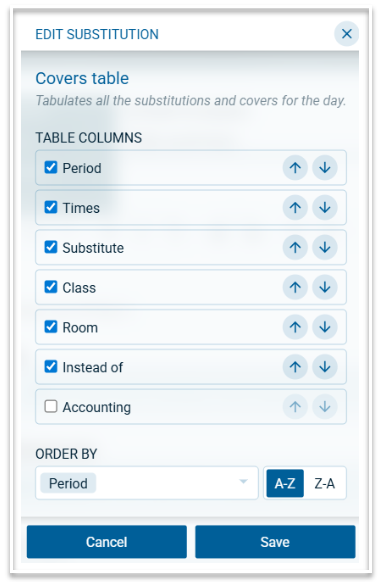
- To configure the table, select the pencil icon. This will give you options for how the table will appear. For example, columns can be added, removed or re-ordered and the contents of the table can be sorted by selecting an option from the Order by dropdown. Make sure you save any changes using the ‘Save’ button at the base of the 'Edit Substitution' window.
- Use the template Save button to save all changes made on the template.
Day Sheets
Day sheets display the classes to which a replacement teacher has been assigned. A list of students in each class is provided.
To print or email Day sheets, go to Work > Day sheets, select the required date and recipients and then select Print or Email.
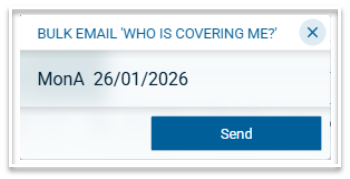
Who got my lesson?
To email absent teachers a list of their replacements, go to Work > Emailing >Bulk email ‘who got my lesson?’ This will open the following dialog: