
How to configure access to the Staffing Preferences Portal
The Staffing Preferences portal is a multi-user feature that allows teachers with a 'Head of Faculty' role to update the staffing preferences for their faculty in preparation for a new timetable. Detailed below are the steps required to configure the access to the portal.
Assigning the Head of Faculty Role
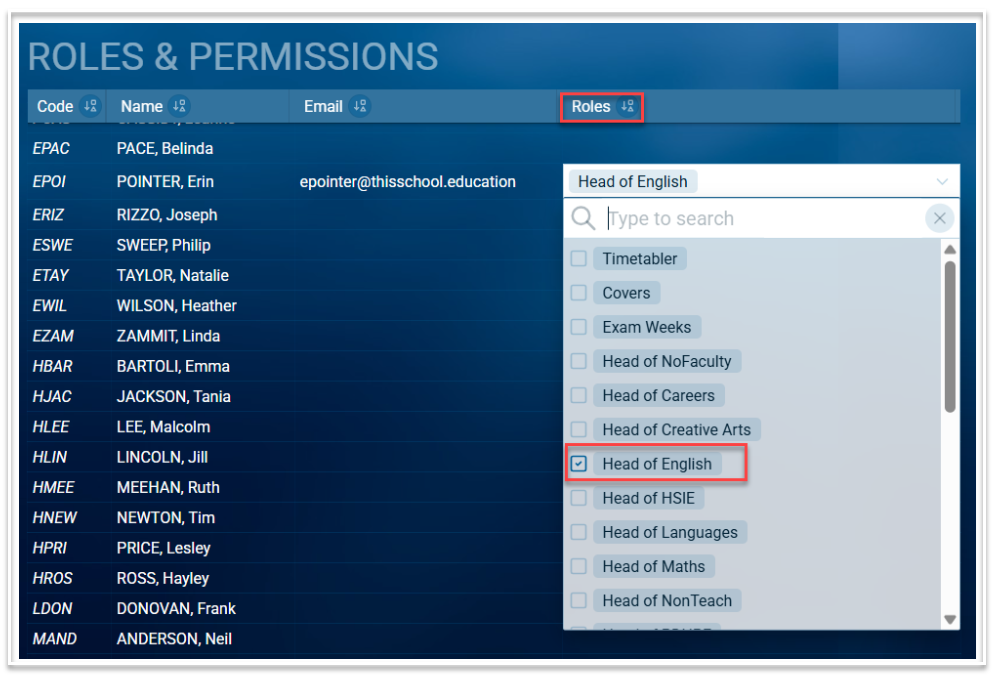
- In the Timetable module, go to File > Roles and Permissions
- Teachers who have been added to the Teacher table (Data entry > Teachers) will appear in the Roles and Permissions table. Ensure they have an email address, as this is required to access the portal.
- In the Roles column, for each head of faculty, select the relevant 'Head of' role. Note that multiple roles can be assigned
Configuring the Access Schedule
To make the Staffing Preference portal available for heads of faculties to access, the Access schedule must be configured.
- Go to File > More > Access schedule
- On the 'Schedules' tab, select the relevant dataset. Datasets would be marked as 'Current' for this year's timetable or 'Upcoming' for the next academic year's timetable. If there is no 'Upcoming' dataset, you will need to rollover your file to create the official file for the next academic year.
- On the Staffing Preferences card, select the dates for when you wish the portal to open and to close. Once the 'Open from' date is reached, the portal will be open for access until the closing date.
- Click on 'Save configuration'

Notifying Heads of Faculties
Once the Access schedule has been configured, Heads of faculties can be notified via email that the portal is open. Notifications can be enabled once an email template has been created.
Email Templates
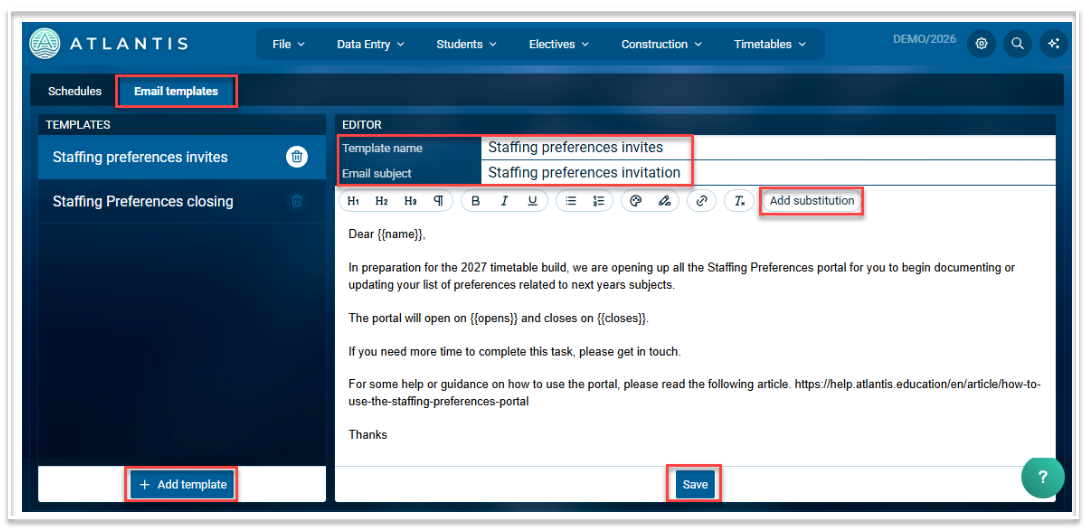
- To create an email template, go to File > More > Access schedule and select the 'Email templates' tab
- Select 'Add template'
- By default, this will be named 'New template'. Change this to something relevant e.g. 'Staffing Preferences invite'
- Add an appropriate email subject
- Compose the email using the formatting tools if required.
- There are mail merge options under 'Add substitution', namely code, name, email, opens (the opening date) and closes (the closing date).
- When complete, select 'Save'.
Configuring Notifications
Once you have created an appropriate email template, you can set up a notification via the Staffing Preferences Access schedule card.
- Go to File > More > Access schedule and select the 'Schedules' tab
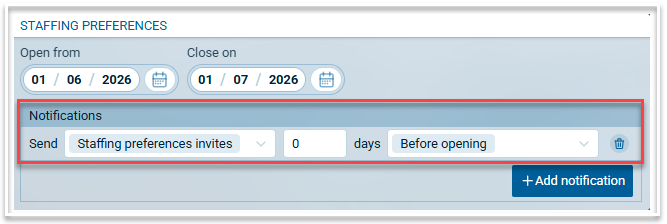
- On the Staffing Preferences card, select 'Add notification'
- To set up when you would like the email to be sent, select the required template from the first drop down list, enter the number of days and then select either 'Before opening' or 'Before closing' from the second drop down list. The email will be sent automatically on the configured date to all teachers with a Head of Faculty role.
- To remove the notification, select the trash icon.
Viewing the Staffing Preferences Screen
Timetablers have visibility of the staffing preferences and any notes made by Heads of Faculties in the HoD Staffing Preferences screen. This is located under File > More > HoD staffing requests.