
The Timetable Structure Screen
This screen defines the structure of the timetable, meaning what classes must go on at the same time and what must not go on together.
- A group of vertically arranged classes/structures is called a 'vertical structure'. In a vertical structure, students must be divided into the member objects in the sense that they must go to one and only one of the member objects, and the member objects will all be on at the same time (so students would have a clash if they were to be in two or more member objects). Vertical structures have labels with rounded top corners. Here is an example of a vertical structure:

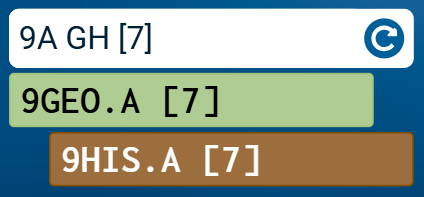
- A group of horizontally arranged classes/structures is called a 'horizontal structure'. In a horizontal structure, a student must go to each of the member classes/structures. These classes/structures must therefore all be on at different times, otherwise the students would have a clash. Horizontal structures have labels with rounded corners on the left side. Here is an example of a horizontal structure:

- There is a 3rd type of structure called a 'rotation structure' but this is used less often. A rotation structure is used when the academic year is broken up into 2, 3 or 4 date ranges and at each transition the students rotate between the member classes/structures. Rotation structures are visually displayed with the member objects descending diagonally down from the title tab and their labels display a circular arrow icon. Here is an example of a rotation structure
Each structure has a title tab. This tab displays the name of the structure. You're expected to give a meaningful name to each structure, but if you haven't done this yet then a numeric id is displayed instead. The title tab might also display other properties of the structure if you have requested this via the toolbar checkboxes.
How do I work the structure screen
You can use the mouse right-click action on each class, and also each structure title tab. This will open a right-click menu with a bunch of available actions:
- Cut A 'cut'n'paste' operation is used to move an object from one structure to another.
- Copy A 'copy'n'paste' operation is used to duplicate a class or structure.
- Paste into Use this on a structure (i.e. the structure's title tab), not a class. The contents of the clipboard will be inserted into this structure at the end of other members.
- Paste here The contents of the clipboard will become a sibling of whatever class or structure you're clicking on, located immediately before it. This action gives you a little more control than 'paste within' because you can control the sequence of the member objects in a structure. The sequence of the member objects has no influence on the timetable, but it helps to keep the structure diagram neat.
- Add Create a new class/structure at this position.
- Duplicate Duplicate all elements of the structure.
- Delete (self-explanatory).
- Simplify There are certain ways to simplify a structure without changing any semantics. For example, if you have a vertical structure within a vertical structure, then this is an unnecessary level of complexity and the member objects can be collapsed to a single level. Likewise a horizontal structure inside a horizontal structure is an unnecessary level of complexity/sub-structure and should be avoided.
- Jiggle up/left and Jiggle down/right : Even though the sequence of member objects is semantically irrelevant, if you want to rearrange the sequence of objects in a structure to make it neater/more intuitive, then you can use these actions. The specified class (or structure) will be moved up or down in the sequence one position at a time.
Vertical integration (across year-levels):
Usually, each "top-level structure", i.e. the structure you see in one screen, represents a single year-level. However, you can also combine two (or more) year-levels into a single structure. You do this if you want to implement "vertical integration". For example, by aligning Yr11 and Yr12 lines you can have Yr11 students take Yr12 subjects and vice versa.
To combine two year-levels together, use the "cut" action on the top-level label of one year's structure, (i.e. right-click on the top-level label and select "cut"), and then go to the other year-level (by selecting it on the toolbar), and paste into there.
To reverse this operation, i.e. to have each year-level in its own structure again, is a two-step process: first separate the two year-levels within the one screen, by having the top-level structure as a vertical structure consisting of just two child structures, namely the structure for each year-level. When you've done this, a button will appear on the label called [split]. Pressing that will put the structures into different screens again.
Advanced features
'Add > 2x2': A 2x2 is two horizontal structures, each of 2 vertical structures. This menu item is simply shorthand for 3 actions it would take to build that, and a 2x2 is not a new type of structure. (The Atlantis team would not want to support a structure where both periods are aligned vertically and class-lists aligned horizontally because it would be hard to justify why we are aligning periods when it doesn't actually matter.)
If you want a 3x2 then you can duplicate one of the horizontal structures.