
The Rollover Process
To begin the rollover process, go to File > More > Rollover to new year. The following window will open:
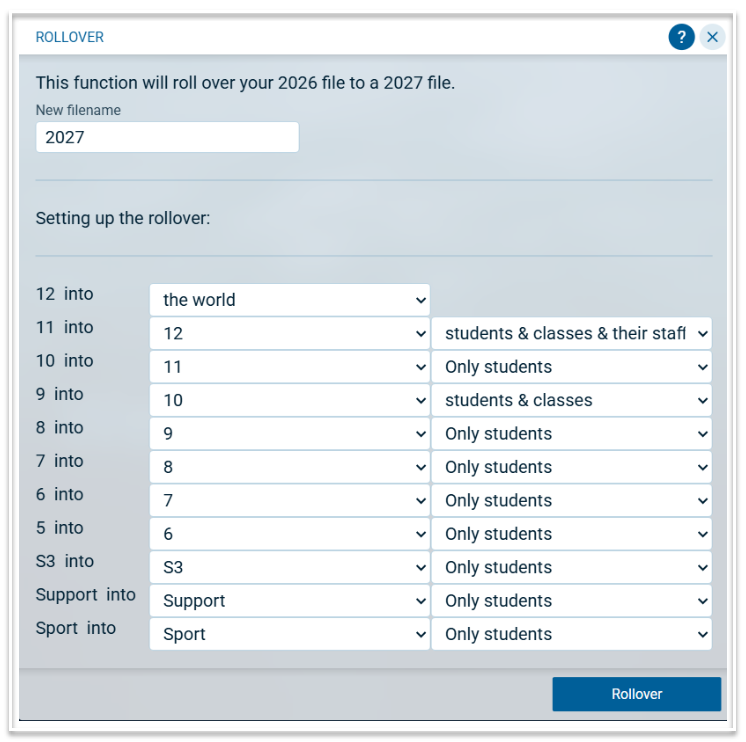
New filename
The new file name will automatically populate with the next Academic year. It is recommended that you keep that name, as only official files (those named with an academic year) can be used for subject selection. You can do a File > Save as to make copies of the rolled over file. This is useful if you wish to try multiple iterations of line generations.
Setting up the rollover
Next, indicate into which year level, the students in each year level will move. This has been populated automatically with the year level above or 'the world' but can be changed manually if required. For multi-year levels such as Support or Sport, the year should stay the same, as this will maintain the courses and structures.
What will rollover?
In the second column, the drop down options are:
- Students & classes & their staff. This option is used when students maintain their current classes and the staffing of their classes remains roughly the same.
- Students & classes. This option is used when classes for students are likely to remain the same but changes to the staffing of those classes are likely.
- Only Students. This option is used when students will move into new classes with new staffing.
When everything has been configured to meet your requirements, select 'Rollover'. This will create and load the new file. The rollover process maintains data in Data Entry tables in Setup, Teachers, Rooms, and Allowances. It will maintain or update information in Classes, Courses and Structure, depending on which option was selected for the rollover.