
Creating a Duty Roster
Once a timetable has been created, Atlantis can generate a duty roster automatically using a smart algorithm that considers teacher timetables, maximum duties a teacher can be given, sets of teachers that can be assigned to each duty area, plus a series of weights which can be adjusted to suit a school’s particular requirements. The duty roster can be manipulated manually using 'drag-and-drop' actions to move teachers from one slot to another. For multi-campus schools, a duty roster can be created for each campus.
Steps to create a duty roster
- Create the Duty Areas
- Determine the maximum number of duties each teacher can be given
- Generate the duty roster
- Adjust the roster manually if required
Duty Areas
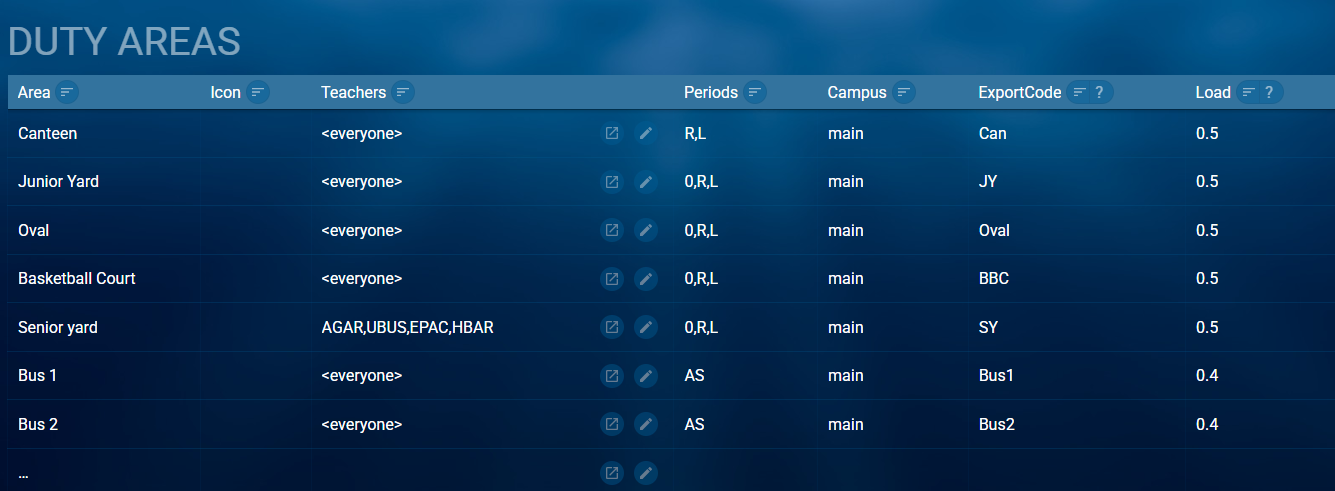
The first step in creating a duty roster is to enter the areas in which duties are carried out. This is done via Construction > Rosters > Duties > Duty Areas
For each area required, specify
- the name of the duty area
- the set of teachers who can be given a duty in that area. If there are no restrictions on who can do the duty, leave it as <everyone>
- the periods in which that area will have duties assigned
- the load value of the duty. As duties are usually done in periods that are less than a full teaching period, a pro-rata value is usually required here. For example, if a typical teaching period is 50 minutes, and the duty is done at recess which is 20 minutes, the value of the load would be 0.4
- The campus where the duty takes place (for multi-campus schools)
- Additional information such as an icon and an export code can be entered if required.
When a duty area is used in multiple periods, and the length of those periods differ, it is recommended that a separate area is created for each period of different length so that the correct duty load can be assigned. For example, if the Oval is used for duty in period 0, which has a length of 30 minutes and is also used in recess and lunch which have a length of 20 minutes, 2 Óval areas should be created (such as Oval-0 and Oval-RL). This means that the Oval-0 area can be assigned to period 0 and have a load of 0.6 while the Oval-RL area can be assigned to Recess and Lunch periods and have a load of 0.4
Duty Loads
There are two places where the maximum duty load per teacher can be entered.
- Data Entry > Teachers > Max Duties
- Construction > Rosters > Duties > Duty loads
A value entered or edited in one place will automatically be entered or edited in the other.
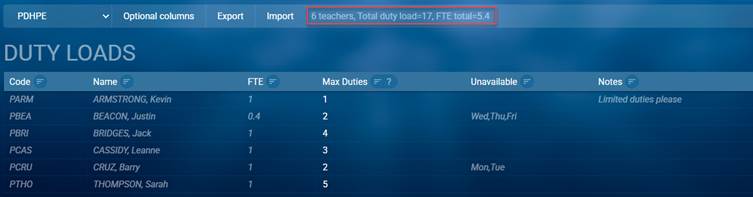
The Duty Loads table, which can be filtered by faculty, contains the following information to assist you in determining the maximum number of duties a teacher can be given.
- The FTE value for the teacher
- When the teacher is unavailable
- Notes
This information is sourced from Data Entry > Teachers and is read only. Note that the duty load information for the selected faculty is also displayed.
Creating the Duty Roster
The Duty roster can be generated automatically or can be created manually using a drag and drop process. To access the Duty roster, go to Construction > Rosters > Duties > Duty roster.
For multi-campus schools, use the campus filter to select the required campus.
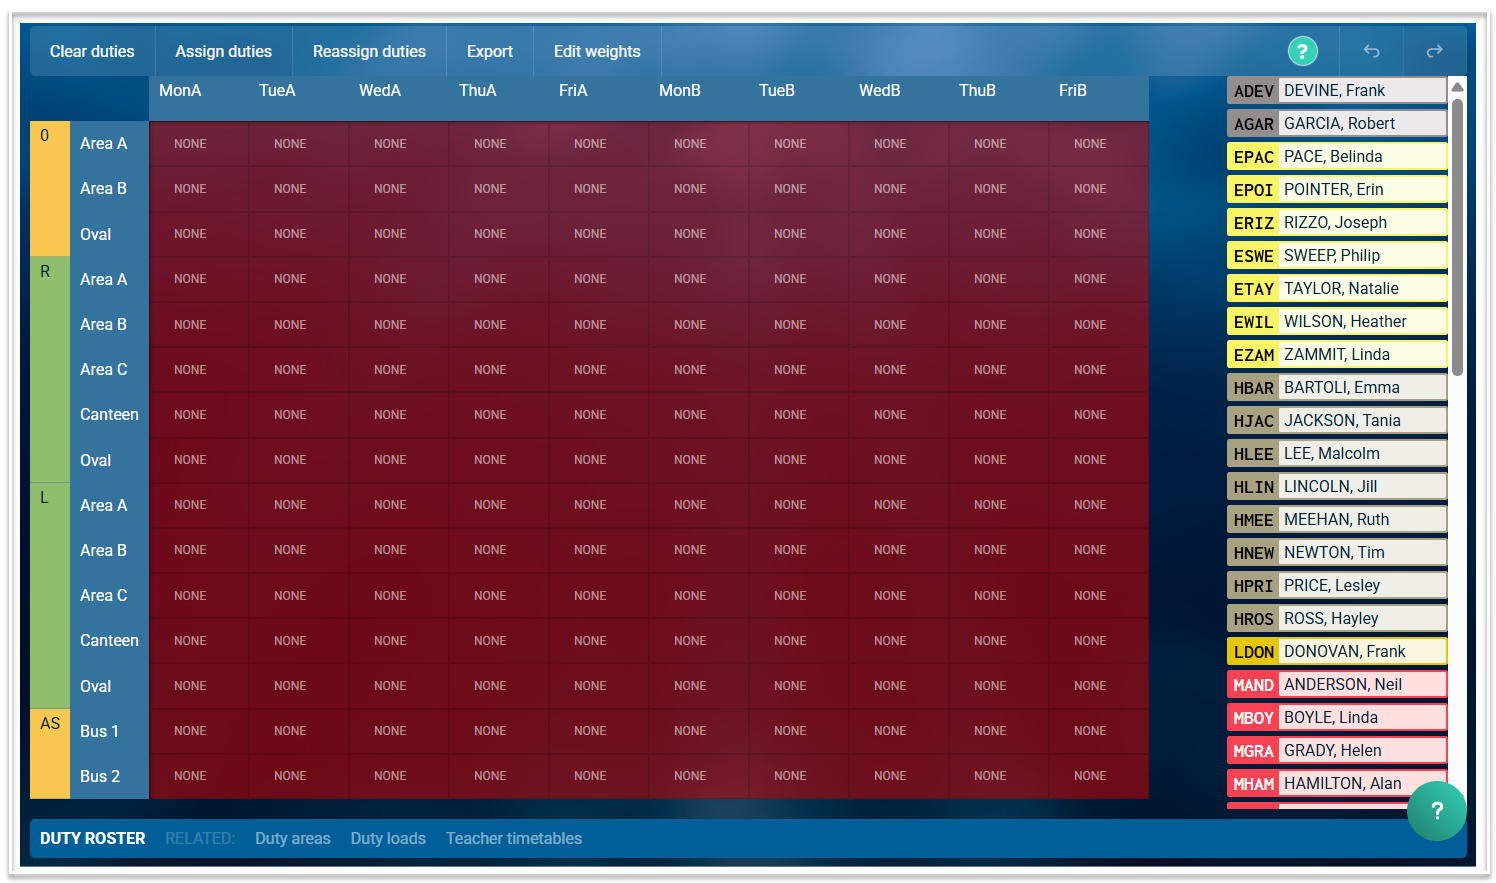
The Duty roster screen, prior to duties being assigned, will look like this. Teachers who can be assigned duties are listed on the right of the roster.
Weights
The duty roster can be automatically generated, based on a series of weights which assign penalties when certain conditions occur. To adjust the weights, click on the Edit weights button. This will open the following window.
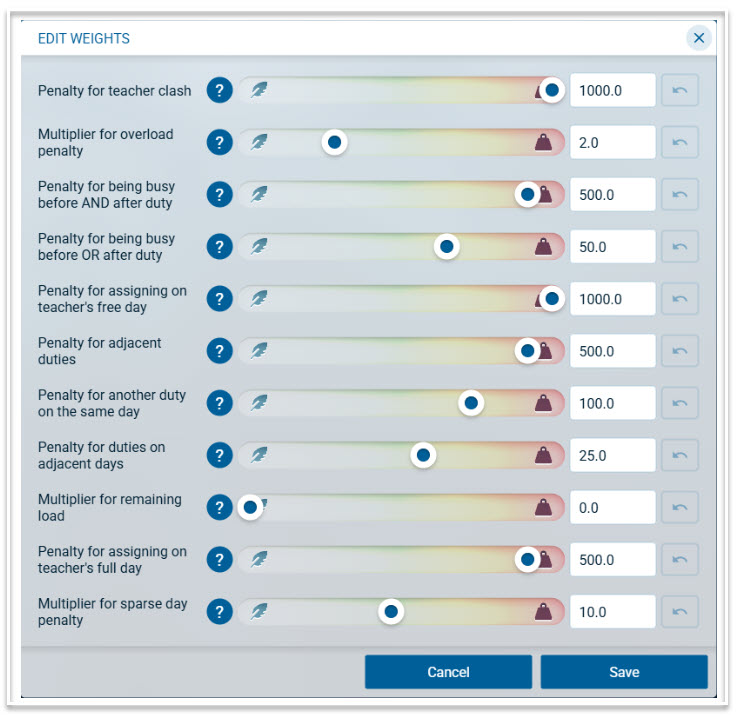
Default weights have been assigned, which usually work well, however, these can be adjusted to suit your school’s requirements.
Generating the Roster Automatically
To assign teachers to duties automatically, click on ‘Assign Duties’. This will place available teachers into duty slots. If there are teachers who have not been assigned their maximum number of duties, they will be displayed in the unassigned section at the foot of the roster.
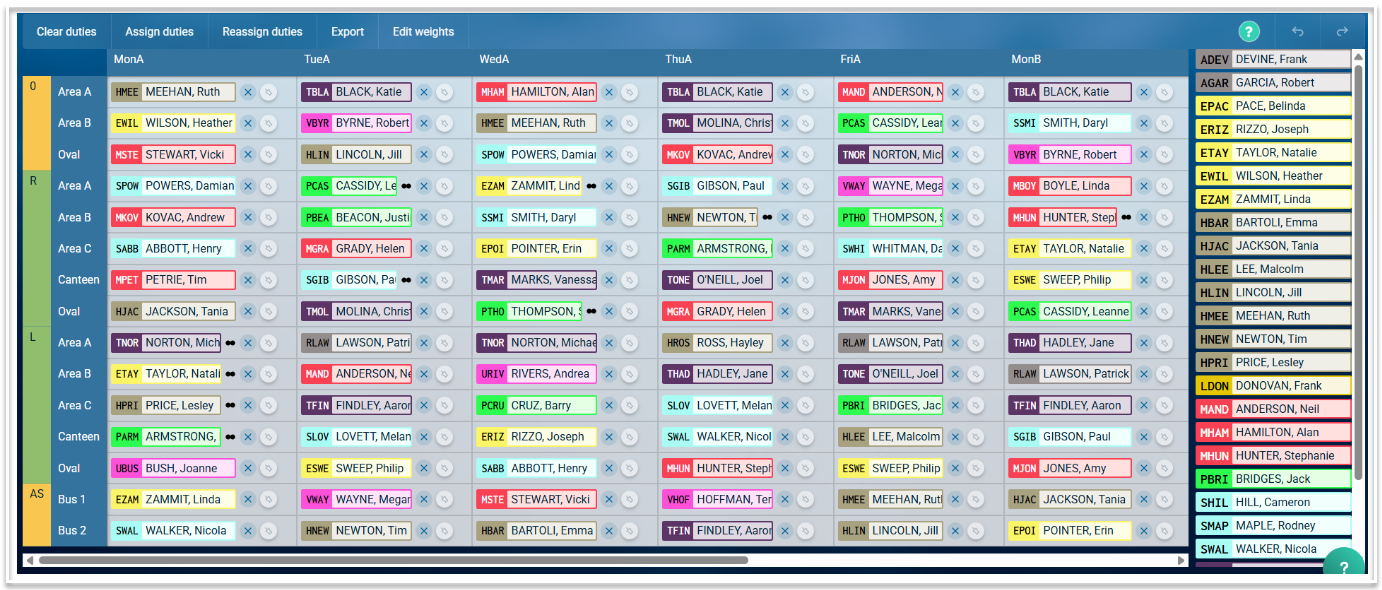
A completed roster for a single campus school will look like this.
Creating the Roster Manually
To create the roster manually, select a teacher from the unassigned section and drag them into the required duty slot. When dragging a teacher, available slots will be marked with a blue dot.
Additional Information
- If a teacher is dragged from the unassigned section and dropped into a slot already assigned to another teacher, they will replace the assigned teacher.
- If a teacher is dragged from one slot to another slot already assigned to a teacher, the teachers will swap duties.
- To remove a teacher from a duty, click on the ‘x’ beside their name.
- The complete roster can be cleared by selecting “Clear duties”. Note that a confirmation dialog will appear when this is selected, to prevent accidental clearing of the roster.
- Duties can be pinned to prevent them moving. This is useful if you wish to assign some duties manually and then auto-generate the rest of the roster. Click the pin icon next to the teacher’s name to pin that duty.
- An orange triangle will denote a teacher clash when a teacher is assigned to more than one duty per period.
- Once a teacher has been assigned their maximum number of duties, they will not be displayed in the unassigned section.
Multi-campus schools
For schools with multiple campuses, functionality exists that will allow you to build separate duty rosters for each campus.
1) Duties are normally assigned to the No Students year level but because a year level can only be assigned to one campus, you will need to create a new year level to assign the duties for the second campus. This new year level needs to be flagged 'For meetings'. It is recommended that the No Students year level is assigned to the main or senior campus and the newly created year level is assigned to the other campus. For example, you can create a PDuties year level and assign that year level to the Primary campus. When duty classes have been created, check the Classes screen to ensure that duties have been assigned to the correct year level. If they are not in the correct year level, use the 'Years' field (you may need to enable this via optional columns) to change them to the correct year level.
2) In Duty Areas, ensure that the campus is specified for each area.
3) In the Duty roster, use the campus filter to view each campus roster to assign teachers.